Vintage and retro photography is all in fashion today! People are crazy about Instagram filters and old look in photos it makes even ordinary photos more stylish and vintage.
Photoshop is the best tool to create vintage effect! In this post we are going to Learn about vintage styles. I will explain how to create these effects, its an easy tutorial on how you give a stylish vintage look to your ordinary photos.
There are many ways to reach the vintage effect. Some of them are simple, some are more complex. It doesn't matter which one you will use if your result is cool :) I am going to start it with simple methods and will explain all of them later.
Vintage Effect - 1:

To create this vintage look open your file using Photoshop CS 6/5 and follow the following steps:
For this tutorial we are using this image.
This photo has taken from this link:
This photo has taken from this link:
http://www.netcarshow.com/buick/1953-skylark/800x600/wallpaper_01.htm

Step 1:
Create your image as a layer in Photoshop. Double click the "Background" layer and rename it int "Layer 1" or any other name you want to.

Step 1:
Create and adjustment layer over "Layer 1" by clicking on the icon on the 4th number in below image.


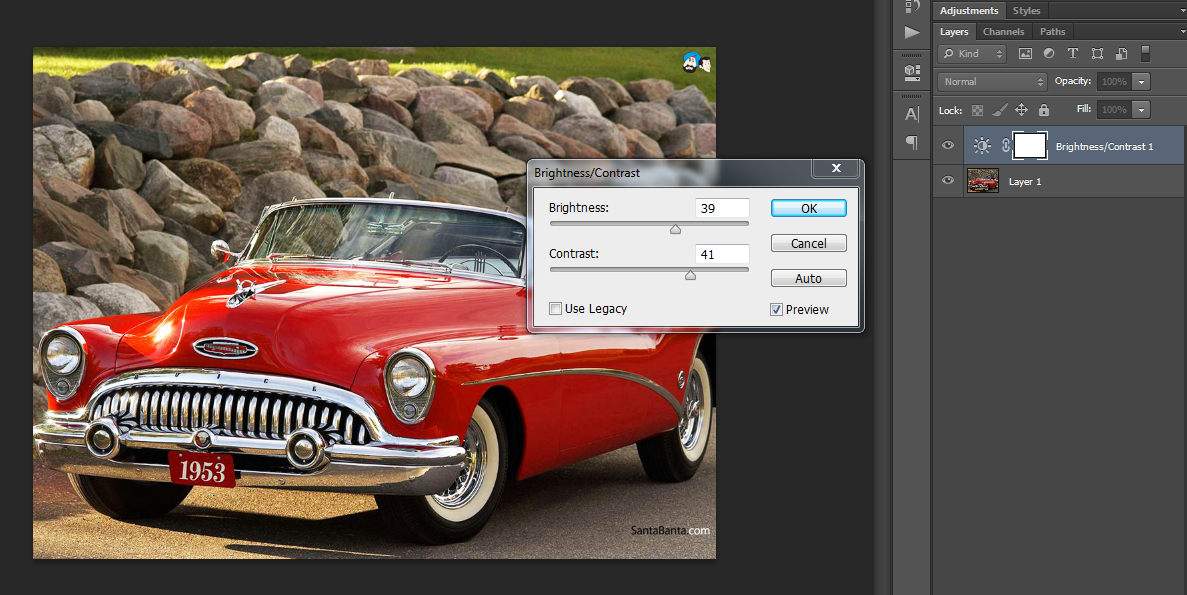
Click on Brightness/Contrast and make following adjustments. You can change the values later according to your image.
Step 2:
Create another adjustment layer by clicking on Hue/Saturation and make following adjustment.

Step 3:
Create another adjustment layer by clicking on Curves, select and make following adjustment.
- click on option button and select "Enhance Per Channel Contrast"
-click on different RED, GREEN AND BLUE channels and adjest their value accordingly.

Step 4:
Click on "Lens Correction Filer" or Press "Crtl + F" (for Mac users press Cmd + F)
Open Lens correction window and make adjustments according to your camera model.

Step 5:
Create another adjustment layer by clicking on Hue/Saturation and make following adjustment.

Set Opacity of the layer 58% or according to the look of your photo. It can be changed later.

Step 6:
Create another adjustment layer by clicking on "Solid Color". Choose the bright Pink color (Color Code: #ff009c) and set the layer Opacity to 6%.

Step 7:
To create the final look, Add another adjustment layer by clicking on Curves, select and make following adjustment by dragging the curve point below the slope.

Here our vintage effect is complete and the result is astonishing and stylish!

I hope you have learned this vintage effect, Now you can apply it to any of your photos to make them more stylish.
I will be uploading more Vintage and other Effects tutorials Very soon. If you like my tutorial please leave the comments :)
No comments:
Post a Comment